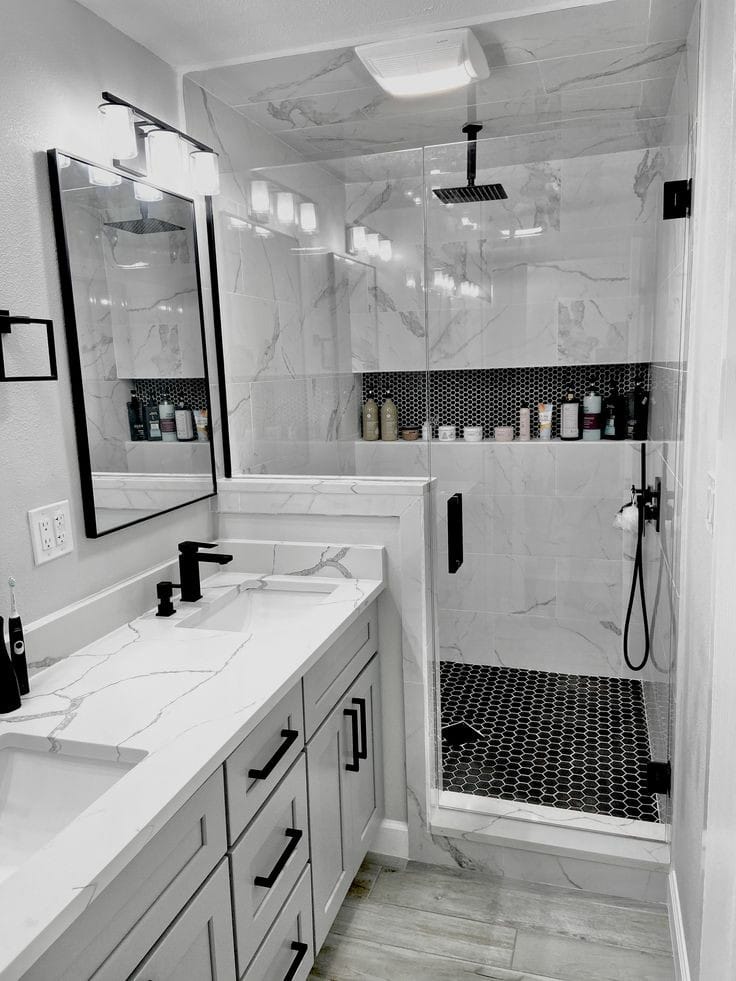
Renovating our bathroom has been on our home improvement wish list for years. After much planning, we finally embarked on this exciting journey to turn our outdated space into a modern oasis. Ready to walk through the initial state process of your bathroom to the beautiful result we now enjoy every day?
Before the Renovation, our old bathroom was functional but far from inspiring. Tiles are worn out, with limited storage that is cramped and outdated. Interior designs feel awkward, with small spaces to move around. Here’s a glimpse of what we were working with:
Outdated Design: The bathroom looks like it hasn't been touched for over a century.
Poor Layout: The existing layout made the space feel much smaller than it was.
Lack of Storage: We had minimal storage options, leading to cluttered countertops.
Planning & Designing
When planning the renovation, our first goal was to create a modern, serene space that felt open and airy and could fully expand movements. Spend more time identifying ideas and researching more designs that satisfy you. Neutral color palette with pops of color, sleek fixtures, and plenty of storage. Here’s what we decided on:
Color Scheme: Soft grays, whites, and natural wood tones.
Materials: Porcelain tiles for the floor, subway tiles for the shower, and a quartz countertop.
Fixtures: A floating vanity with ample storage, a frameless glass shower door, and matte black fixtures.
Layout: We decided to reconfigure the layout by moving the toilet to a more discreet location and expanding the shower area.
What are the considerations I need to make for this project?
1. Planning and Budgeting
Assess Your Needs: Determine what needs to be changed. This could be fixtures, flooring, tiling, or even a complete overhaul.
Set a Budget: Bathroom renovations can range from a few hundred to thousands of dollars. Decide how much you are willing to spend and prioritize the most important upgrades.
Design Inspiration: Gather ideas from magazines, Pinterest, or design websites to visualize your ideal bathroom.
2. Design and Layout
Measure the Space: Accurate measurements are crucial for purchasing fixtures and planning the layout.
Choose a Layout: If you're not moving plumbing, keep the existing layout to save on costs. If you’re open to a complete redesign, consider how to maximize space and functionality.
Select Materials: Decide on tiles, countertops, paint colors, and fixtures. Consider both aesthetics and durability.
3. Hiring Professionals vs. DIY
DIY: If you’re handy, you might handle tasks like painting, tiling, or even installing fixtures yourself.
Professionals: For plumbing, electrical work, or complex installations, hiring professionals ensures the job is done correctly and up to code.
4. Demolition
Clear the Space: Remove old fixtures, tiles, and any other elements you’re replacing.
Check for Issues: Look for mold, water damage, or plumbing issues that need to be addressed before proceeding.
5. Plumbing and Electrical Work
Install or Relocate Pipes: If you’re moving the sink, toilet, or shower, the plumbing will need to be adjusted.
Update Electrical: Add or relocate outlets, install lighting, and ensure everything is safely wired.
6. Install Fixtures
Tub, Shower, and Toilet: These major elements should be installed first.
Vanity and Sink: Install after the major fixtures, ensuring plumbing is correctly connected.
Lighting and Mirrors: Add functional and decorative lighting, and install mirrors.
7. Tile and Flooring
Tile Walls and Floors: Lay tiles carefully, especially around wet areas like the shower.
Grouting: After the tiles are set, apply grout to seal them and prevent moisture from seeping through.
8. Painting and Finishing Touches
Paint the Walls: Choose a moisture-resistant paint for durability.
Accessories: Add towel bars, hooks, shelving, and other accessories that enhance both function and style.
9. Final Inspection
Check for Leaks: Ensure all plumbing is leak-free.
Test Fixtures: Make sure lights, outlets, and all fixtures work properly.
Clean Up: Remove any debris, clean surfaces, and enjoy your new bathroom.
10. Maintenance
Regularly clean and check for issues like leaks or mold to keep your new bathroom in top condition.
Let us know if you need more specific advice on any of these steps!
Once the design was finalized, the renovation began. Here’s how it went down:
Demolition: We tore out the old tiles, vanity, and fixtures, although this will be a messy work it was satisfying to see the old bathroom disappear.
Plumbing & Electrical: We hired professionals to move the plumbing and update the electrical wiring to accommodate new lighting and outlets. Safety should still be considered.
Tiling: The new floor and shower tiles were installed next. We chose a herringbone pattern for the floor to add some visual interest. Patterns will help appeal and satisfy the desired needs.
Painting: We painted the walls a soft gray to complement the white subway tiles and wood accents. Make sure that the corners of the wall are also painted properly.
Fixtures: New vanity, toilet, and shower fixtures were installed. The floating vanity opened up the space, and the matte black fixtures added a modern touch.
After the Renovation, the transformation was even better than we had imagined. Our bathroom now feels twice as big, thanks to the improved layout and design choices.
Renovating your bathroom is a good idea not only to increase home space but to enhance functionality. With First Impressions Construction, we make your dream happen by giving it luxurious quality and aesthetic appeal. Consider your bathroom renovation because we are ready to satisfy your desired looks that can increase to your home value, functionality, and quality. Thinking of planning it? Well, First Impressions Construction is ready! Contact us for a schedule to undergo thorough consultation and let your bathroom be on our hands.

